Link2sd Part 2

3
Using Link2SD

  1. 1
    Insert your SD card back into your Android device.
  2. 2
    Power on your device, and launch the Google Play Store app.
  3. 3
    Search for and install the Link2SD application. If using a computer, you can download and install Link2SD on your Android at https://play.google.com/store/apps/details?id=com.buak.Link2SD.
  4. 4
    Launch the Link2SD app on your Android device after installation is complete.
  5. 5
    Tap on “ext2,” then tap on “OK.
  6. 6
    Restart your phone at the prompt, and reopen the Link2SD application.
  7. 7
    Tap on “Settings” within Link2SD, and place a checkmark next to the “Autolink” option. This feature will instruct your device to automatically move all new games and apps to the second partition on your SD card.
    • Place a checkmark next to “Create link” if you want existing apps and games moved to the second partition.
  8. 8
    Tap on “Storage info” at any time in Link2SD to view the memory status for your device’s internal memory and SD card partitions.[2]

Link 2 sd using tips

Part2
Creating Another Partition

  1. 1
    Download and install the MiniTool Partition Wizard at http://www.partitionwizard.com/.
  2. 2
    Insert your Android’s SD card into an SD card reader or adapter.
  3. 3
    Insert the SD card reader into an available USB slot on your computer.
  4. 4
    Move or copy any files you want saved from your SD card to your computer.Using Link2SD will wipe and erase all data from your SD card.
  5. 5
    Launch the MiniTool Partition Wizard application on your computer.
  6. 6
    Right-click on your SD card at the bottom of the MiniTool Partition Wizard, and select “Delete.
  7. 7
    Right-click on your SD card again, and click on “Create New. The “Create New Partition” window will display on-screen.
  8. 8
    Select “FAT32” from the “File System” drop-down menu.
  9. 9
    Select “Primary” from the “Create as” drop-down menu.
  10. 10
    Enter your desired partition size, then click on “OK. The partition you just created will be your SD card’s primary partition.
  11. 11
    Right-click on your SD card at the bottom of the Partition Wizard window and select “Create New.
  12. 12
    Verify that “Primary” is selected within the “Create as” drop-down menu.
  13. 13
    Select “Ext2” from the “File System” drop-down menu. This will be the second partition on your SD card in which apps and games can be stored.
  14. 14
    Enter the desired partition size, then click on “OK.
  15. 15
    Click on “Apply” at the top of the MiniTool Partition Wizard. Your SD card will now be partitioned.

Rooting your Android

Part1
Rooting Your Android

  1. 1
    Back up all personal data on your Android to your computer, Google, or another cloud storage service. Rooting your device will wipe all personal data.
    • Refrain from saving any data to your SD card, since using Link2SD will require you to format and erase the data on your SD card.
  2. 2
    Tap on “Settings,” then tap on “About Phone.
  3. 3
    Tap on “Developer Options,” then place a checkmark next to “USB debugging.
  4. 4
    Download and install a third-party rooting application compatible with your Android device. Root your device using Towelroot, or root your device using Kingo. Both rooting apps are compatible with most Android devices.
  5. 5
    Follow the on-screen instructions to root your Android using a rooting application. The rooting process will vary depending on the make and model of your Android device. When rooting is complete, a “Superuser” app will be available in your Apps folder, indicating your Android has been successfully rooted.[1]

How to Root Android without Computer (APK ROOT without PC)

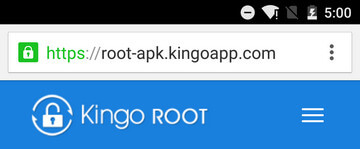
Step 1: Free download KingoRoot.apk.

The download will be automatically started. If Chrome has warned you about KingoRoot.apk, click "OK" to proceed.

If you are using PC to view this tutorial, you have three choices.

Step 2: Install KingoRoot.apk on your device.

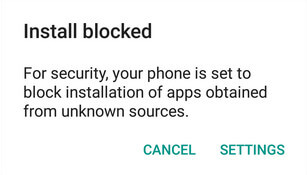
If you didn't check "Unknown Sources" in Settings > Security, then during installation, you will get a prompt "Install blocked", stating that "For security, your phone is set to block installation of apps obtained from unknown sources".
Root any Android device with KingoRoot, the best one-click Android apk root tool.
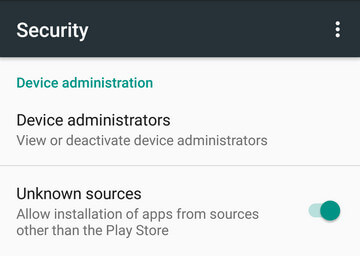
Just follow phone instructions and install Kingo Root on your device and allow installs from "Unknown Sources".
Root any Android device with KingoRoot, the best one-click Android apk root tool.

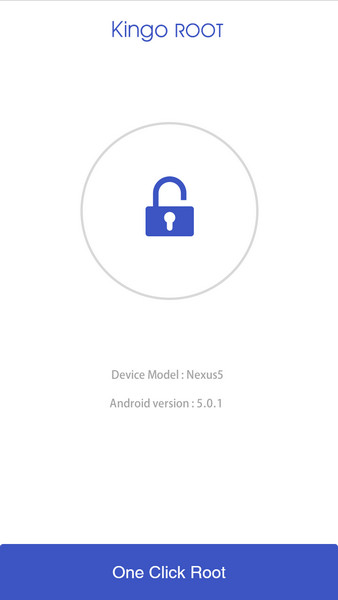
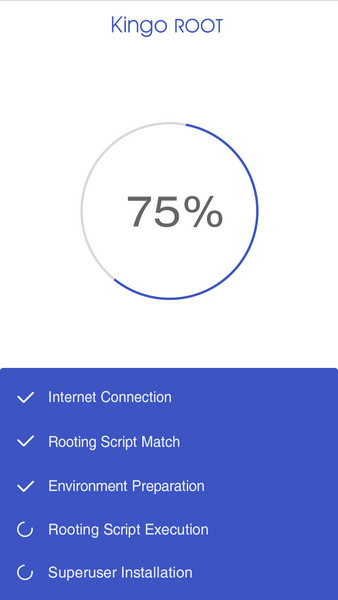
Step 3: Launch "Kingo ROOT" app and start rooting.

Kingo Root is very user-friendly and easy to use. Click "One Click Root" to start the rooting process.
Kingo Root Apk Main Interface

Step 4: Waiting for a few seconds till the result screen appear.

Kingo Root Apk Rooting

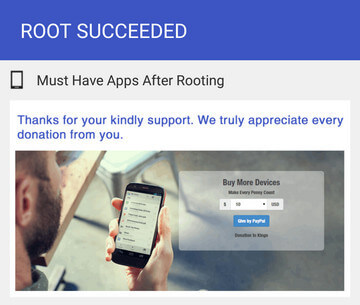
Step 5: Succeeded or Failed.

It is highly recommended that you try several times when rooting with KingoRoot apk version. We have several rooting methods integrated in apk root, however, it will only run one at a time.
Kingo Root Apk Root Succeed

Flashing fastboot ROM on Xiaomi Mi Max with ulocked bootloader

You can download latest Xiaomi Mi Max Fastboot File here – http://en.miui.com/a-234.html
  1. Download and install XiaoMiFlash on your PC.
  2. Download and unpack required fastboot ROM .rar archive.
  3. Extract ROM files in C:/xiaomimax (or any other, but use short folder name).
  4. Start XiaoMiFlash, start your device in fastboot mode and connect to PC.
  5. Select downloaded ROM folder on C:/ drive.
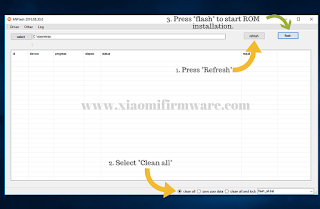
  6. Press “Refresh” to check if device is connected properly.
  7. Select “Clean all” (will result to format of all partitions). “Save user data” can also be used, but only if you’re flashing to the same version of ROM.
  8. Press “flash” to start ROM installation. After installation device will automatically reboot.

10 मुहर्रम यानि यौम ए आशुरा का रोज़ा

आज आशूरा के रोजे रखे है हमने! मुहर्रम की ये तारीख (10 मुहर्रम) वैसे इसलिए मायने रखती है कि मूसा अलैहस्लाम की कौम को जालिम फिरौन से निजात मिली थी, बाद में इसी तारीख को कर्बला का वाक्या हो गया। यहूदी लोग फिरौन से निजात और मूसा अलैहस्लाम के ग़ालिब होने के शुक्राने के तौर पे 10 मुहर्रम को रोज रखते थे। अल्लाह के रसूल ने हमे भी हुक्म दिया की हम भी आशूरा का रोजा रखे लेकिन यहूदियों की मुखालफत में दो दिन के रोजे का (9-10 या 10-11) हुक्म हुवा!

ये दिन हमे याद दिलाता है जुल्म के खिलाफ खड़े होने की चाहे हमारे सामने जालिम फिरौन के जैसा ताकतवर ही क्यों न हो। साथ ही ये भी जानने के लायक है कि हक की लड़ाई में जीत और हार कोई मायने नही रखती, वहाँ फिरौन मारा गया और मूसा अलैहस्लाम की जीत हुई, यहाँ हुसैन रजिअल्लाहु की शहादत हुई, लेकिन अल्लाह के यहाँ हिसाब जीत हार पे नही होता, अल्लाह के यहाँ तो इंसान की कोशिशें मयार है असली कामयाबी की। आज जब हम हर जगह मारे जा रहे है, जरूरत है हमे भी जुल्म के खिलाफ खड़े होने की फिर चाहे सामने फिरौन जैसी ताकते ही क्यों न हो। या तो अल्लाह समुन्द्रों को चीर के जालिमो को डूबे देगा या हम हुसैन रजिअल्लाहु के नक्शे कदम पे चलते हुए शहादत का जाम पि लेंगे। लेकिन दोनों ही हालातों में हम ही कामयाब होंगे ! आशूरा के हमारे इन रोजो को अल्लाह कुबूल करें, और हमे जुल्म के खिलाफ खड़े होने की ताकत दे।

"थक हार के ना बैठ, चल उठ ए मर्दे मुजाहिद ,
नतीजे नही, अल्लाह के यहाँ कोशिशे मयार है ।"

~नसीम

मोब ल्य्चिंग के खिलाफ हुआ प्रदर्शन


इन्शानी बिरादरी की जानिब से इकबाल मैदान में मोब ल्य्चिंग के खिलाफ शांति प्रदर्शन एवं हस्ताक्षर अभियान  !

Work for Humanity in Madhya Pradesh

भीड़ द्वारा की जाने वाली हिंसा के खिलाफ प्रदर्शन 

Link2sd Part 2

3 Using Link2SD 1 Insert your SD card back into your Android device. 2 Power on your device, and launch the Google Play...